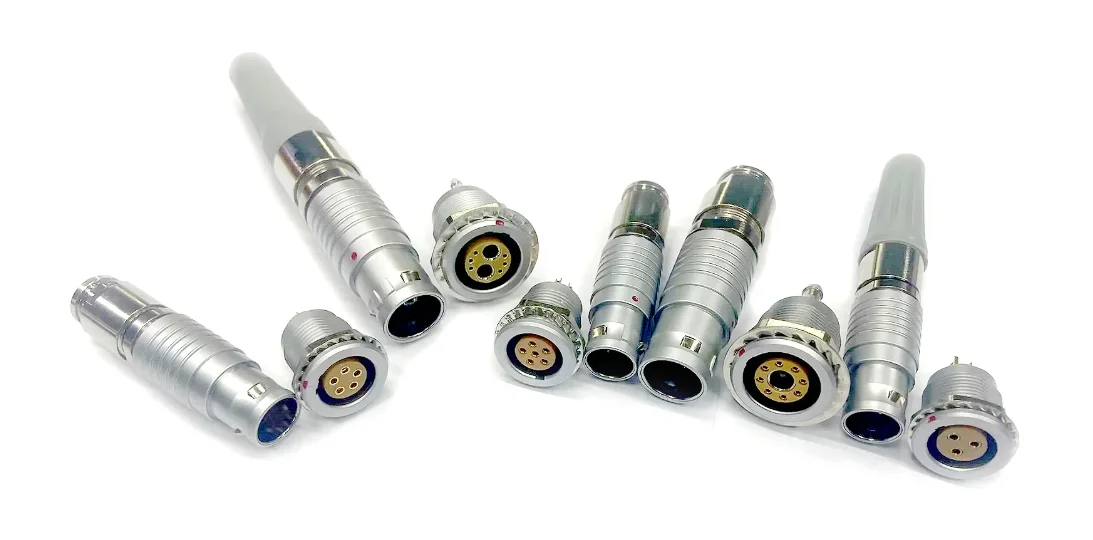
Push-pull self-locking connectors are essential components in various electronic applications, providing reliable and secure connections. These connectors are designed for ease of use, allowing quick mating and unmating without the need for additional tools. This guide will walk you through the step-by-step process of installing push-pull self-locking connectors, ensuring optimal performance and reliability.
Understanding Push-Pull Connectors
Push-pull connectors consist of a male plug and a female receptacle that engage with a simple push. They feature a self-latching mechanism that secures the connection, preventing accidental disconnection. These connectors are widely used in industries such as telecommunications, medical devices, and industrial equipment due to their robust design and ease of use.

Tools and Materials Needed
Before starting the installation process, gather the following tools and materials:
Push-pull self-locking connectors (male and female)
Wire strippers
Soldering iron or crimping tool (depending on the connector type)
Heat shrink tubing (optional)
Multimeter (for testing connections)
Cable ties (for cable management)
Step 1: Preparing the Wires
Strip the Wires: Use wire strippers to remove approximately 1/4 inch of insulation from the ends of each wire that will connect to the push-pull connector.
Inspect the Wires: Ensure that there are no frayed strands or damage to the wire insulation. Clean any debris from the stripped ends.
Step 2: Connecting Wires to the Connector
Depending on whether you are using solder or crimp contacts, follow one of these methods:
For Solder Contacts:
Tin the Wire Ends: Heat your soldering iron and apply a small amount of solder to the stripped ends of each wire.
Insert Wires into Solder Cups: Place the tinned wire ends into the solder cups of the connector contacts.
Solder the Connections: Heat the solder cup with your soldering iron until the solder melts and flows around the wire. Allow it to cool for a solid connection.
For Crimp Contacts:
Select Appropriate Crimp Tool: Choose a crimping tool suitable for your connector type.
Insert Wire into Contact: Place the stripped end of the wire into the crimp contact.
Crimp the Connection: Use the crimping tool to secure the contact onto the wire firmly. Ensure it is tight enough to withstand pulling forces.
Step 3: Assembling the Connector
Insert Contacts into Insulator: Carefully insert each contact into its respective position in the insulator until you hear a click, indicating they are fully seated.
Secure with Collet Nut: Slide the collet nut over the insulator and hand-tighten it to secure everything in place.
Step 4: Final Assembly
Install Outer Shell: Place the outer shell over the assembled insulator and contacts.
Tighten Retaining Nut: If applicable, screw on any retaining nuts or back nuts to secure the assembly further.
Check Alignment: Ensure that all components are aligned correctly and that there are no obstructions preventing proper mating.
Step 5: Testing Connections
Visual Inspection: Check for any visible signs of damage or misalignment in your connections.
Use a Multimeter: Test continuity across connections using a multimeter to ensure proper electrical flow.
Check for Shorts: Ensure there are no shorts between adjacent wires or contacts.
Step 6: Cable Management
Organize Cables: Use cable ties to bundle wires neatly, avoiding tangling or stress on connections.
Label Cables (Optional): For easier identification in complex installations, consider labeling each cable according to its function.
Common Issues and Troubleshooting
Even with careful installation, issues can arise with push-pull connectors. Here are some common problems and their solutions:
Problem 1: Difficulty Mating Connectors
Cause: Misalignment or foreign particles obstructing connection.
Solution: Carefully inspect both connectors for alignment and clean any debris before attempting to mate again.
Problem 2: Intermittent Connections
Cause: Poor soldering or crimping leading to weak connections.
Solution: Recheck all connections; resolder or re-crimp if necessary.
Problem 3: Accidental Disconnection
Cause: Insufficient locking mechanism engagement.
Solution: Ensure that you push firmly until you hear a click indicating that it is securely locked.
Maintenance Tips for Push-Pull Connectors
To ensure longevity and reliable performance from your push-pull connectors:
Regular Inspections: Periodically check connectors for wear or damage.
Clean Connectors: Keep connectors free from dust and moisture, which can affect performance.
Avoid Excessive Force: Handle connectors gently during mating and unmating processes to prevent damage.
Conclusion
Installing push-pull self-locking connectors can significantly enhance your electronic projects by providing secure and reliable connections. By following this step-by-step guide, you can ensure proper installation, troubleshoot common issues effectively, and maintain your connectors for long-lasting performance. Whether you're working on industrial equipment, medical devices, or telecommunications systems, mastering this installation process will contribute to successful outcomes in your projects.
How Auto Connectors Improve Efficiency and Reliability in Automotive Systems